Introduction
Are you the proud owner of a Hearivo QV-Pro but need help getting it started? Don’t worry; you’re not alone. This handy guide will walk you through the step-by-step process to quickly turn on your Hearivo QV-Pro. Whether you’re a tech novice or a seasoned gadget enthusiast, we’ve got you covered.
Understanding the Hearivo QV-Pro
Features and Benefits
The Hearivo QV-Pro is a cutting-edge device known for its versatility and user-friendly design. It’s perfect for those seeking a seamless blend of functionality and innovation. With features like intelligent connectivity, robust battery life, and intuitive controls, this device is designed to simplify your digital life.
Why It’s a Popular Choice
Its sleek design and advanced technology have made it a favourite among users who value quality and efficiency. Plus, it’s easy to use, even for beginners.
Unboxing Your Hearivo QV-Pro
What’s Inside the Box
Before you power up your device, check the box for the following:
- Hearivo QV-Pro device
- Charging cable
- User manual
- Additional accessories (if applicable)
Checking for Accessories
Ensure all components are present and undamaged. Parts need to be taken to ensure the setup process.
Preparing for Setup
Reading the Manual
The user manual is your best friend. Please take a few minutes to read it thoroughly to understand your device’s features and setup instructions.
Charging the Device
Your Hearivo QV-Pro may come partially charged. Connect it to a power source using the provided charging cable and let it charge until the LED indicator shows a full battery.
Ensuring Proper Placement
Place your device on a stable surface during setup to avoid accidental drops or damage.
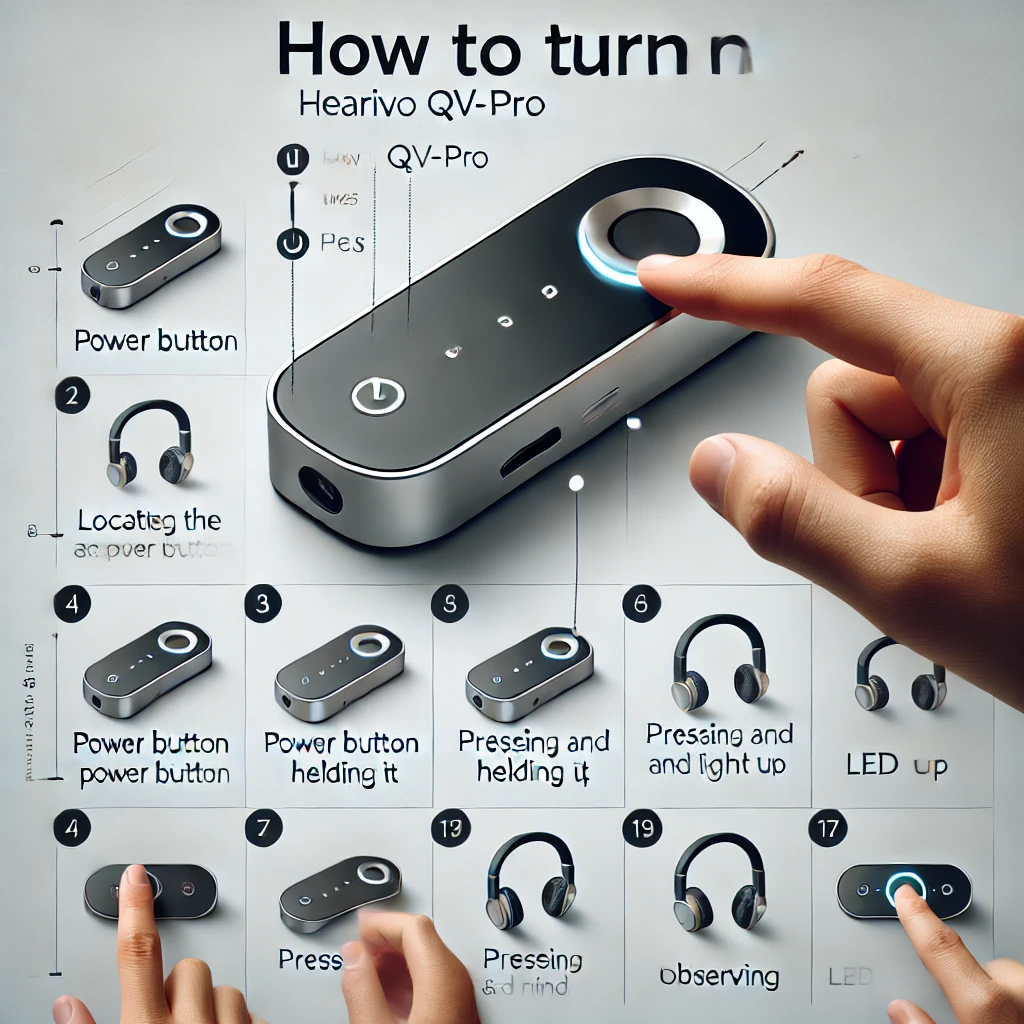
Steps to Turn On the Hearivo QV-Pro
Locate the Power Button
Find the power button, typically on the device’s side or top.
Pressing and Holding the Power Button
Press and hold the power button for 3–5 seconds until the LED indicator lights up. This signals that the device is powered on.
Observing LED Indicators
Pay attention to the LED lights. They usually blink or change colour to indicate that the device has been turned on successfully.
Troubleshooting Power Issues
Device Won’t Turn On
If your device doesn’t power on, ensure it’s charged. Connect it to a power source and try again.
Charging Problems
Check the charging cable and port for visible damage. To avoid compatibility issues, use only the original charger.
Resetting the Device
If all else fails, consult the user manual for instructions on how to reset the device. This often involves pressing a combination of buttons.
Optimizing Your Device Post-Power-Up
Connecting to a Network
Once powered on, connect your Hearivo QV-Pro to a stable Wi-Fi network to enable updates and access features.
Installing Necessary Updates
Check for firmware updates to ensure your device runs smoothly and securely.
Common Mistakes to Avoid
Skipping the Manual
Ignoring the manual can lead to setup errors or missed features.
Using Incorrect Accessories
Third-party chargers or cables can damage your device. Stick to the original accessories provided.
Maintenance Tips for Long-Term Use
Cleaning the Device
Keep your device clean by wiping it with a soft, dry cloth. Avoid using harsh chemicals.
Firmware Updates
Regularly check for updates to keep your device functioning optimally.
Proper Storage
Store your device in a cool, dry place to prevent overheating or moisture damage.
Conclusion
Turning on your Hearivo QV-Pro is straightforward and sets the stage for a seamless user experience. Following this guide can help you avoid common pitfalls and ensure your device functions at its best. Your Hearivo QV-Pro will serve you well for years with proper care and maintenance.
FAQs
1. Why Won’t My Hearivo QV-Pro Turn On?
Ensure the device is charged and the power button is held for the recommended time.
2. How Long Should I Charge It?
Charge your device for 2–3 hours or until the LED indicates a full charge.
3. Can I Use It Without Connecting to a Network?
Yes, but connecting to a network unlocks additional features and ensures updates.
4. What Do the LED Indicators Mean?
Refer to the user manual for specific LED colour codes and their meanings.
5. How Do I Reset the Device?
Consult the manual for reset instructions, which usually involve a button combination.


